

Examples – (For students registration – /registerStudent, /updateStudentData, /deleteStudent ..)
With these kind of disadvantages, action based way is not recommended now.
Some best practices to use in rest APIs are given below.
Here, first need to identify all the nouns connected to relevant API and also the resource hierarchy. Let’s take students management as an example. Then what are the related nouns for students management. Students, departments, courses, marks, rank, lecturer are few of them. Next step is identify the hierarchy (resources, sub resources relationship)
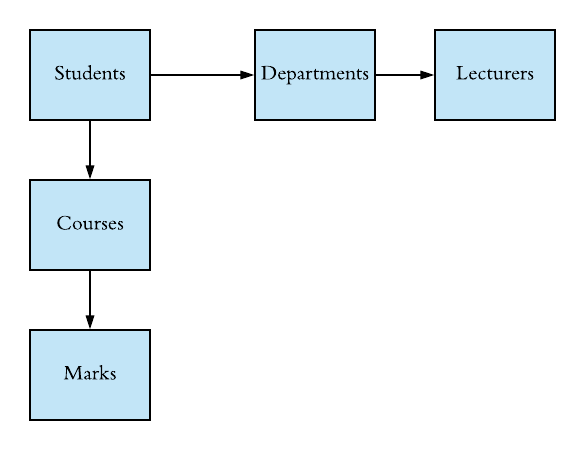
And then need to identify required types of methods on each object or noun (create, edit, select, delete)
There are two major types of nouns in APIs.
Identify the HTTP method for the required operation.
Eg : (to get all students – GET – /students, to get specific user – GET – /students/{id})
Use only plural nouns for all resources.
Eg : /students instead of /student
If a resource is related to another resource use sub resources.
Eg : /students/{id}/courses/{id}/marks
Both, client and server, need to know which format is used for the communication. The format has to be specified in the HTTP-Header.
Content-Type defines the request format.
Accept defines a list of acceptable response formats
Hypermedia as the Engine of Application State is a principle that hypertext links should be used to create a better navigation through the API. It can show the next level APIs which start from this parent resource to chose.
Eg :
{
name : John Simon
age : 20
links : [{
rel : “course”
href : “/course/{id}”
}
]
}
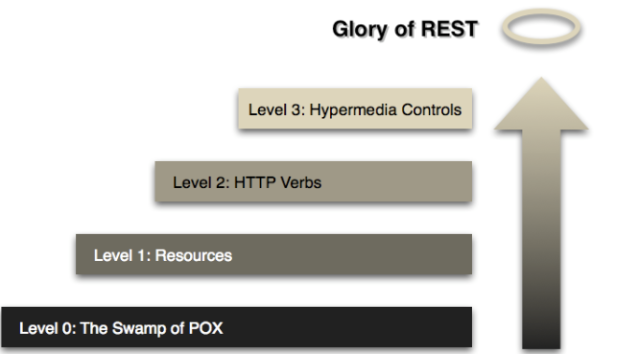
To reach best way of rest API design, authors have used a model of restful maturity that was developed by Leonard Richardson.
Level 0: Using HTTP protocol as main transformation method in web models is in the level 0.
Level 1: Resource based API design is in 1st stage
Level 2: Using the HTTP verbs as closely as possible to how they are used in HTTP itself. Choosing proper HTTP method as the operation.
Level 3: Final level is for HATEOAS recommended way. It will open next links which are possible.
This blog post is about how to get started using SonarLint with Eclipse to get on-the-fly feedback on code quality issues while using the IDE.
SonarLint tool in eclipse is used by developers to get instantaneous feedback for proactive code quality while coding. SonarLint lives only in the IDE (IntelliJ, Eclipse and Visual Studio) and it concentrates on what code you are adding or updating. This most awaited feature is out there for Java, Javascript, and PHP developers to try for themselves. SonarLint offers a fully-integrated user experience in Eclipse-based IDEs. After installing the plugin issues will be reported as Eclipse markers. SonarLint is free, open source, and available in the Eclipse Marketplace.
Both SonarLint and SonarQube have been written using SonarSource technology and rely on the same static source code analyzers.
SonarQube is open-source for continuous inspection of code quality. Sonar is a web based code quality analysis tool works as a central server that processes full analyses on code. It can be triggered by the various SonarQube Scanners. For this, it analyzes all the source lines of your project on a regular basis. It covers a wide area of code quality checkpoints which include: Architecture & Design, Complexity, Duplications, Coding Rules, Potential Bugs, Unit test etc. It offers reports like
SonarLint works offline and it also can be connected to SonarQube server. Special thing is an instant issue checking comes up with this new approach. It sits in the IDE and is totally developer-oriented.
There are few easy ways to install SonarLint to eclipse. After installing the plugin, it will enable common rule set defined by the SonarLint standalone. Note that, this will require Java 8 to run.
SonarLint plugin can be found in Eclipse MarketPlace by searching.
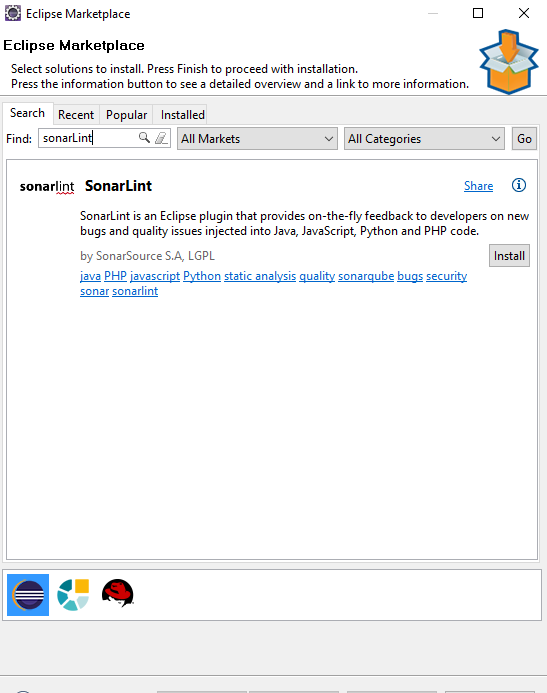
Then start the installation
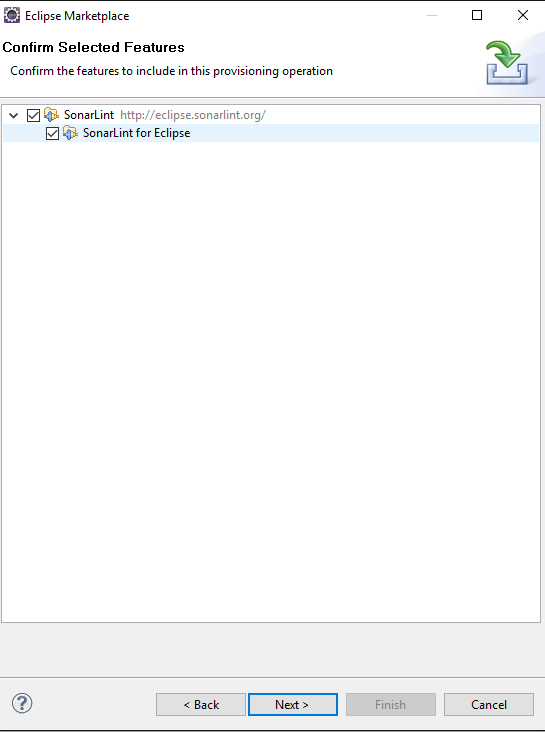
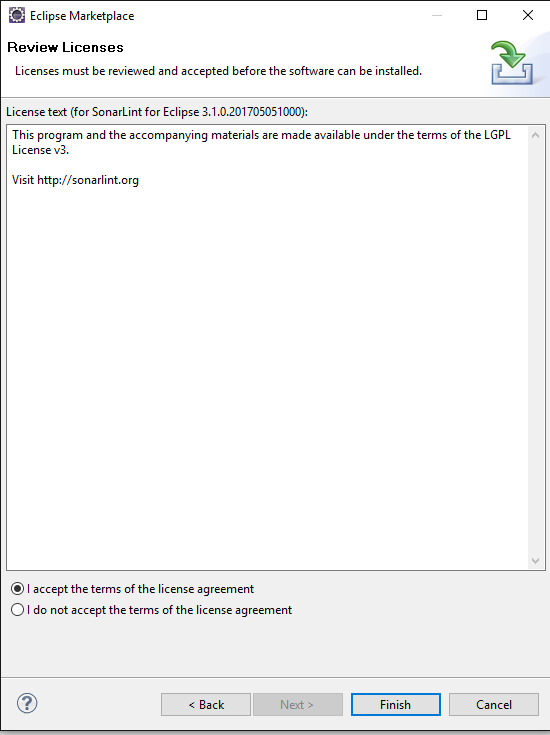
Accept the license agreement there.
Click finish and restart the Eclipse. Then it will enable Eclipse SonarLint marker on issues shown in the code base according to the common pre-set rules with SonarLint standalone.
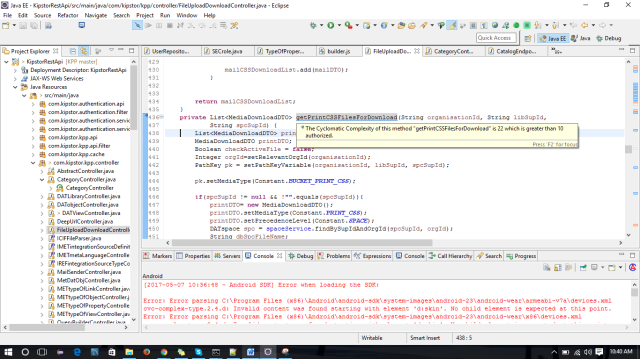
As this image shows, eclipse marker depicts the issue explanation by hovering on it.
Developer can improve the code quality by fixing those issues mentioned with SonarLint on time.
Go to this page (http://www.sonarlint.org/eclipse/) and click on the “Marketplace” button which takes us to the install page. Drag and drop the “install” button into our eclipse workspace and it should start downloading and installing.
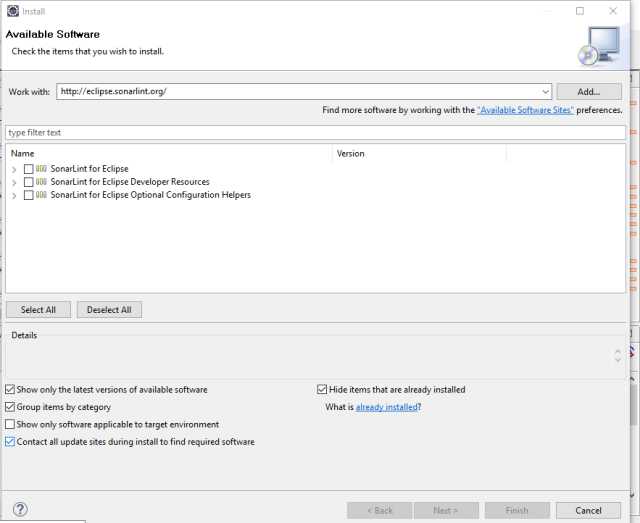
Go to Help -> Install New Software and put this URL ‘http://eclipse.sonarlint.org/’ on the wizard which has opened there.
The integration of SonarLint with SonarQube server would achieve some of the following objectives:
If developer want to stop SonarLint running, it could be disabled this by right-clicking on the project and disabling SonarLint. Sometimes running SonarLint in background is caused to the bad performance of Eclipse. But the most important advantage of SonarLint is helping the developers to avoid the code quality issues much before they appear in the Sonar dashboard.
Binding Eclipse project with SonarQube server project, makes SonarLint use the analyzers, quality profiles and settings defined on the SonarQube server. This is a convenient way of customizing the rules used by SonarLint.
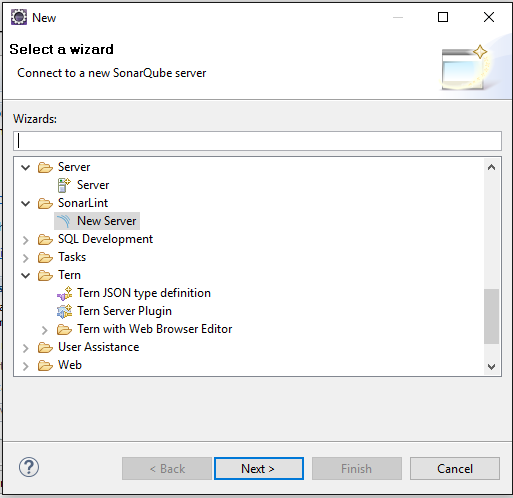
First go to File -> New -> Other -> SonarLint -> New Server
Click next and fill the wizard with the Sonar sever details (URL and credentials) and test connection.
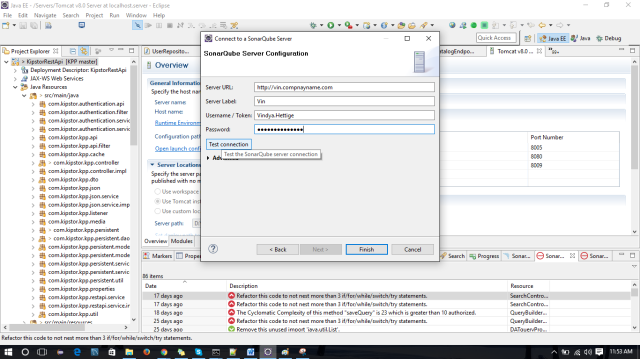
After clicking the finish button, a background process will start updating configuration from the server.
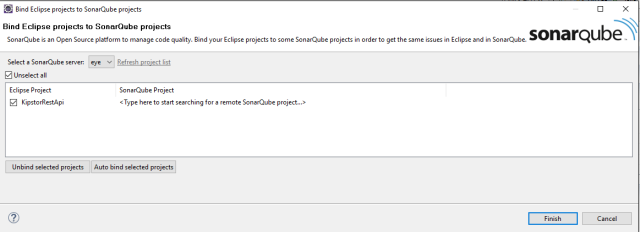
Then Eclipse project can be bind to remote sonar sever project by right clicking on the selected project and go through SonarLint -> Bind to a SonarQube project.

Then select the SonarQube server name from dropdown in the wizard and map required projects from local side and server side and finally click finish.
To manage SonarQube server connection, we can use SonarQube servers views and ‘update all project bindings’ to sync local updates with SonarQube configurations.

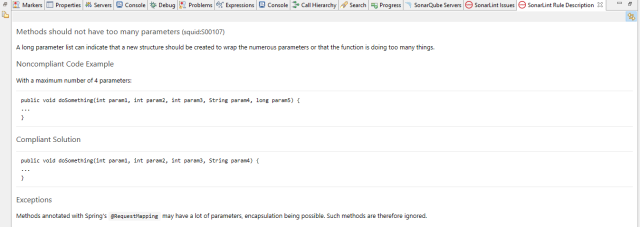
All issues are shown in SonarLint issues view

If developer can see the full description of each and every issue in SonarLint , ‘Link with selection’ view.
Now there is SonarQube overlay on your bound Eclipse project icon. Developer can code and see SonarLint reporting issues based on remote SonarQube configuration.
In this blog post, I hope to present a basic view on OOPJS (Object Oriented JavaScript).
| Undefined | Undefined |
| Null | null |
| Boolean | true |
| String | “foo” |
| Boolean | true |
| Number | 3.14 |
| Object | {name:”Vindya”} |
| Function | function getDataType(){} |
| Array | [“Vindya”,56,{}] |
| RegExp | /v*/ |
All of them are not primitive data types. I have denoted actual primitive data types in green color. Blue color ones and other objects types using in programming, those are called special kind of objects.
A set of name value pairs. It is similar to dictionary or hash from other languages. But fundamentally it is a set of key value pairs. we can use any number of keys with any type (including primitive as well as object) with any value.
Example :
var developer{
name : “Vindya”
age : 25
teamPlayer : true
talent : function programming(){}
office : {name : “abc”, year: 2016, position: “SE”}
}
Here all key value pairs called ‘properties’ and name, age, teamPlayer, talent,office are called keys. As an examples “Vindya”, 25 are values.
If I want to access the ‘office object’ inside this parent object, we can use developer.office. It returns,
{name : “abc”, year: 2016, position: “SE”}
Important : Primitive Types are Passed By Values. Objects are passed by references.
Example :
var num1,num2;
num1= 2;
num2=num1;
num2=5;
But those num1 and num2 values are not connected. So changing the value of num1 is not affected by num2.
num1 is 2 and num2 is 5.
But objects are in other hand. They are passed by references.
Example:
var obj1,obj2;
obj1 ={ a: 1000};
obj2 = obj1; here we copy the obj1 to obj2. But we doing coping the reference.
obj2.a= 5000;
Output: obj1.a= 5000, obj2.a = 5000;
When we change a value of object 2, it will effect to object 1 as well.
Object 1={
a:”abc”,
b:”bce”,
c:”cef”
}
object1.d ? —>> undefined//
Object 1={
a:”abc”,
b:”bce”
}
Function is just a regular kind of objects and with function, we can do everything what regular object can do. When we need to define a function, JavaScript will create an object for us with three properties.
function createEmployFunction(id, name){
var age = 25;
var emp={id:id,name:name};
return age;
}
myFunction[]
name : “myFunction”, //name of the function
length : 2, //number of arguments
prototype : …. // will be explained later.
When we put a function inside an object, it is called an method.
var employee ={
id:2,
get: function addsalary(){
return this.salary;
},
salary: 25000
}
employee.get(); // 25000
Here, I want to explain how to build and deploy a package (jar) file of spring boot maven application using shell script via Jenkins. I’m not going to explain how to create a spring boot maven application, Jenkins installation locally or inside AWS instance and Jenkins common configurations. So for this blog post, I will use prepared and running Jenkins on AWS instance and hope explain required steps very clearly as anyone who new to Jenkins ,can understand.
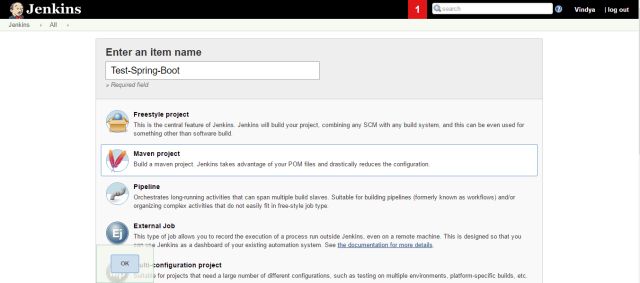
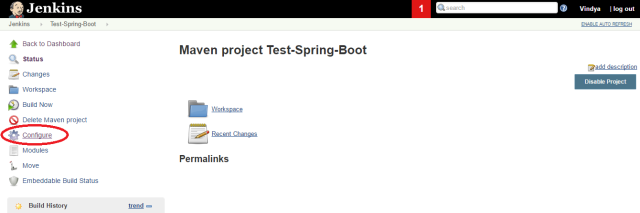
Enter an appropriate name for your new item and select maven project category and click ‘OK’. Then you can navigate to the general configurations of newly created job and you can see it in Jenkins home as well. If you go to the Jenkins home then choose configurations in the right drop down near to the created new job.
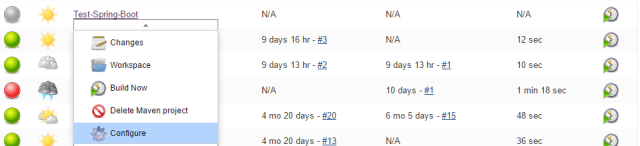
Also you can click on the new item and then you can go to the configuration using left main menu as well.
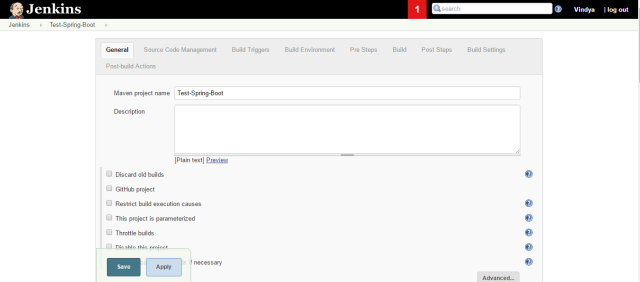
In General section nothing to set and move to next section(source code management). Select Git (It will be enabled by Git plugin in Jenkins). Then provide your repository URL there and provide credentials with your https protocol. If you use public repository, it won’t be provided credentials there. Keep it as ‘none’. After this step is completed, a copy of repository is copied to Jenkins workspace.
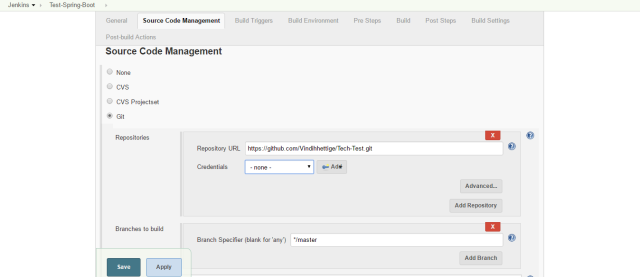
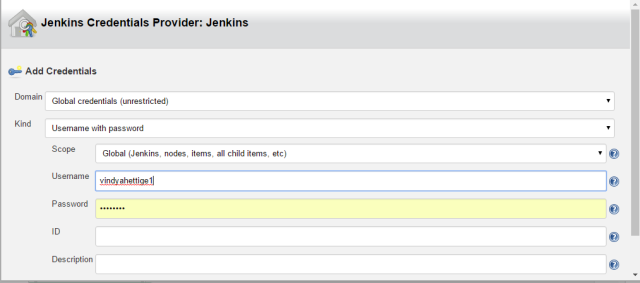
Otherwise, for a private repository, you have to provide generated credentials using git credentials.
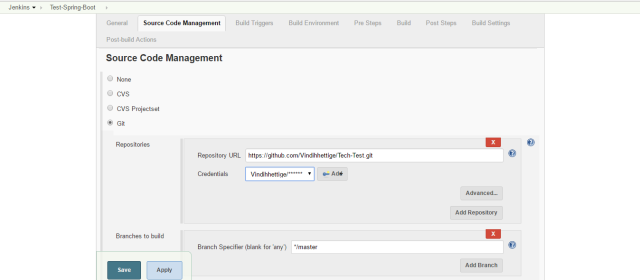
Creating git credentials : Use ‘Add’ with key button and provide your git username and password.
And keep other fields as default in this section and move to next ‘Build Triggers’.
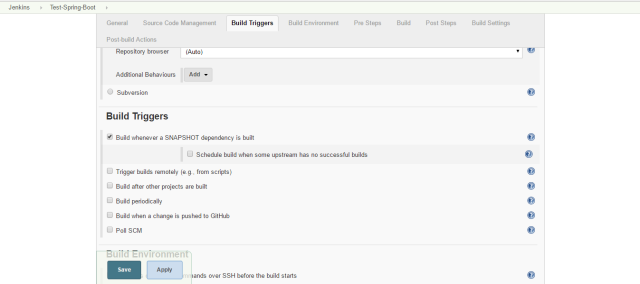
Keep it as default for this maven project and go to next section.
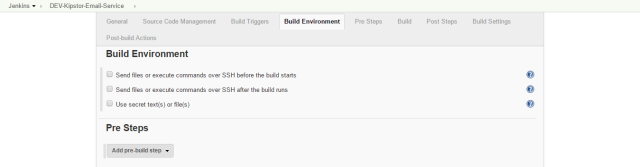
Nothing to do here and leave next pre-steps as well.
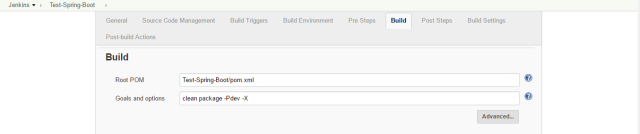
This step is important and for the ‘Root POM’ field, you should provide the POM.xml file of the project in the workspace. Then should provide the build goal as ‘clean package’. If you have to configure this setup to your specific environment (dev, qa, uat or production), then it is need to configure to refer relevant application.property file inside the resource/environment folder normally. That’s why I have given the goal as ‘clean package -Pdev -X’ here to apply dev environment property in this example. If you don’t have such kind of different servers running on different AWS instances, using ‘clean package’ is just enough.
Now, if we save the configuration and build the job, we can see the success in the Jenkins console and we can find the created jar file inside target folder in the workspace. So the remaining step is to deploy the current jar file inside the given sever on given port.
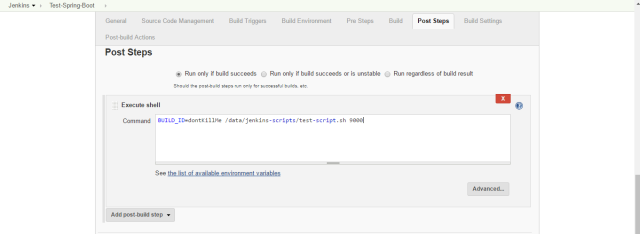
First select first option as ‘Run only if build succeeds’ and then should write a script file as our requirements. These four steps are common steps.
#!/bin/bash
##command-jenkins- BUILD_ID=dontKillMe /data/jenkins-scripts/test-script.sh 9000 DEV
# COMMAND LINE VARIABLES
# deploy port SECOND ARGUMENT
# Ex: 8090 | 8091 | 8092
echo start
serverPort=$1
echo $1
environment=$2
sudo su
#####
##### DONT CHANGE HERE ##############
#jar file
# $WORKSPACE is a jenkins var
echo $WORKSPACE
sourFile=$WORKSPACE/Test-Spring-Boot/target/com.mitrai.testspring.jar
echo $sourFile
destFile=/data/$environment/test-spring/com.mitrai.testspring.jar
echo $destFile
### FUNCTIONS
##############
function stopServer(){
echo insideStop
echo ” “
echo “Stoping process on port: $serverPort”
fuser -k $severport/tcp > redirection &
echo ” “
}
function deleteFiles(){
echo “Deleting $destFile”
rm -rf $destFile
echo ” “
}
function copyFiles(){
echo “Copying files from $sourFile”
cp $sourFile $destFile
echo ” “
}
function run(){
#echo “java -jar $destFile –server.port=$serverPort $properties” | at now + 1 minutes
nohup nice java -jar $destFile –server.port=$serverPort &
echo “COMMAND: nohup nice java -jar $destFile “
echo ” “
}
### FUNCTIONS CALLS
#####################
# 1 – stop server on port …
stopServer
# 2 – delete destinations folder content
deleteFiles
# 3 – copy files to deploy dir
copyFiles
changeFilePermission
# 4 – start server
run
You can execute this script using ‘BUILD_ID=dontKillMe /data/jenkins-scripts/test-script.sh 9000 DEV’ . Here i have passed two parameters(9000- is my selected port, DEV- is my environment-optional) and try to understand how I have used these parameters in the script.
Important : Make remember to upload your script file anywhere (The instance where Jenkins is running, Another instance where do you want to store it and where you can access it easy while considering the usability(DEV,QA or Production)).
In this example I have used same instance for both Jenkins and DEV server. So When I copy created artifact to destination folder, I used ‘cp’ command. If you have to do this between two different servers, then you have to use ‘scp’ command with pem file to access destination instance.
Example: scp -i pem-file-path.pem path to file which should be copied user@mec2-50-17-16-67.compute-1.amazonaws.com:~/.
